Sample disches

Pera Cotta Nel Chianti con Gelato

The Ingredients

To make four stunning poached pears, here is what you’ll need to gather:

4 Abate Pears: Look for pears that are firm but ripe. They need to hold their shape during cooking! (If you can’t find Abate, Bosc or Anjou pears work beautifully too).

10 oz (approx. 300g) Good Red Wine: We highly recommend a Chianti . Simone’s tip: Never cook with a wine you wouldn’t gladly drink from a glass! The quality of the wine is the backbone of your syrup.

7 oz (approx. 200g) Water

1 cup (approx. 200g) Granulated Sugar

1 Whole Star Anise

1 Vanilla Bean, split down the middle

4 Whole Cloves
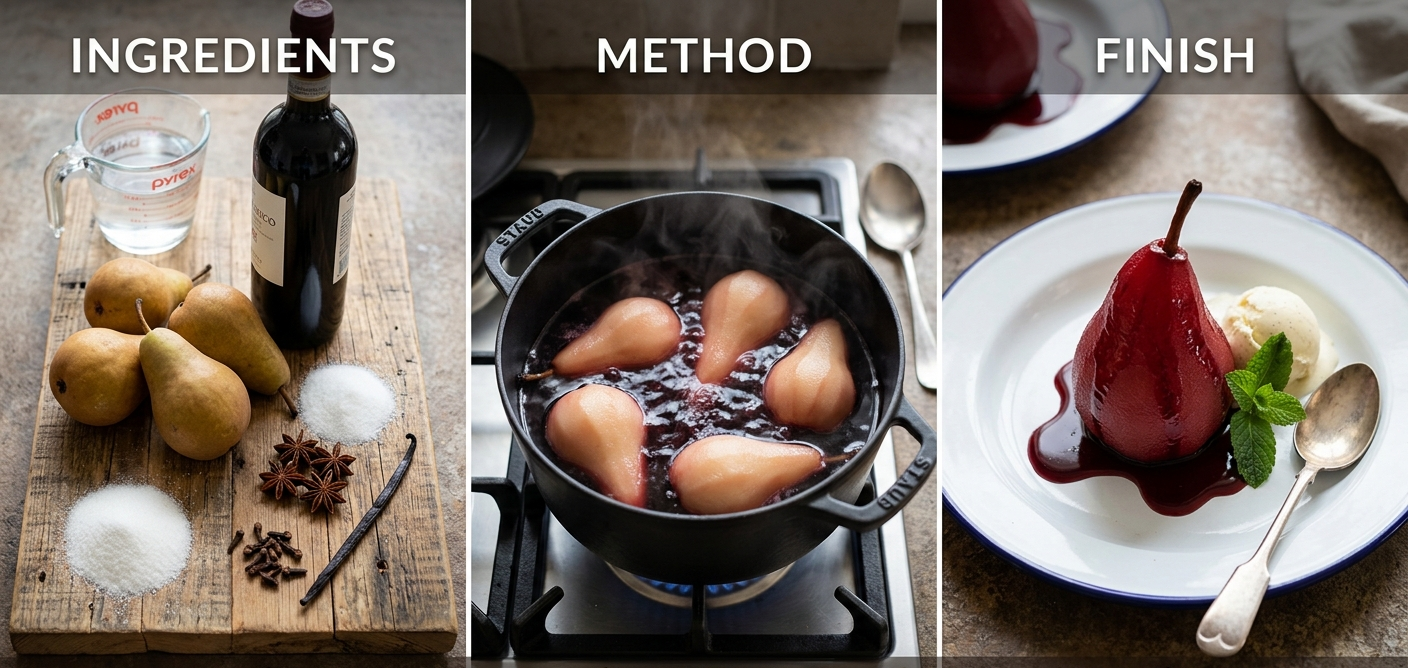
Step-by-Step Method

1. Prep the Fruit

First things first, we need to peel the pears. Carefully peel all four Abate pears, but leave the stems attached—it looks beautiful and rustic on the plate. If you want to go the extra mile, use a melon baller or a small spoon to gently core them from the bottom. This gives them a flat base so they can stand upright when you serve them.

2. Flash-Boil the Wine (Crucial Step!)

In a wide, deep saucepan, pour in your Chianti Classico and bring it to a rolling boil. Let it bubble away for about 2 minutes. This step is a little secret to great flavor: it evaporates the harsh alcohol bite, leaving behind only the concentrated grape flavors, deep color, and beautiful aromas.

3. Build the Poaching Liquid

Turn the heat down slightly and add the water, sugar, star anise, split vanilla bean, and whole cloves to the wine. Give it a gentle stir until the sugar completely dissolves.

4. The Poaching Process

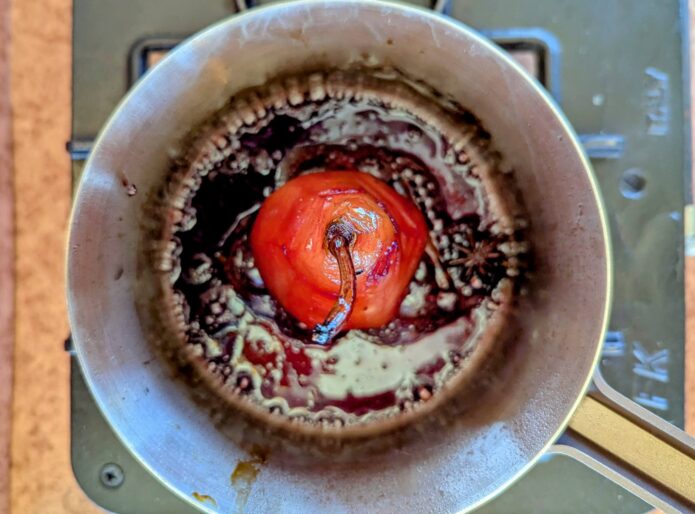
Gently nestle your peeled pears into the spiced wine liquid. They should be submerged at least halfway (if needed, you can add a splash more water or wine). Reduce the heat to a gentle simmer, cover the pan with a lid (or a circle of parchment paper resting right on top of the liquid), and let them cook for about 15 minutes. You want them to be tender when pierced with a knife, but still holding their shape perfectly.

5. Reduce the Syrup

Using a slotted spoon, very gently lift the pears out of the liquid and set them on a plate to cool. Strain the remaining liquid into a bowl to catch the spices, then pour the clean liquid back into the saucepan. Bring it to a boil and let it reduce until it thickens into a glossy, rich syrup. You’ll know it’s ready when it easily coats the back of a spoon.

How to Serve (The Grand Finale)

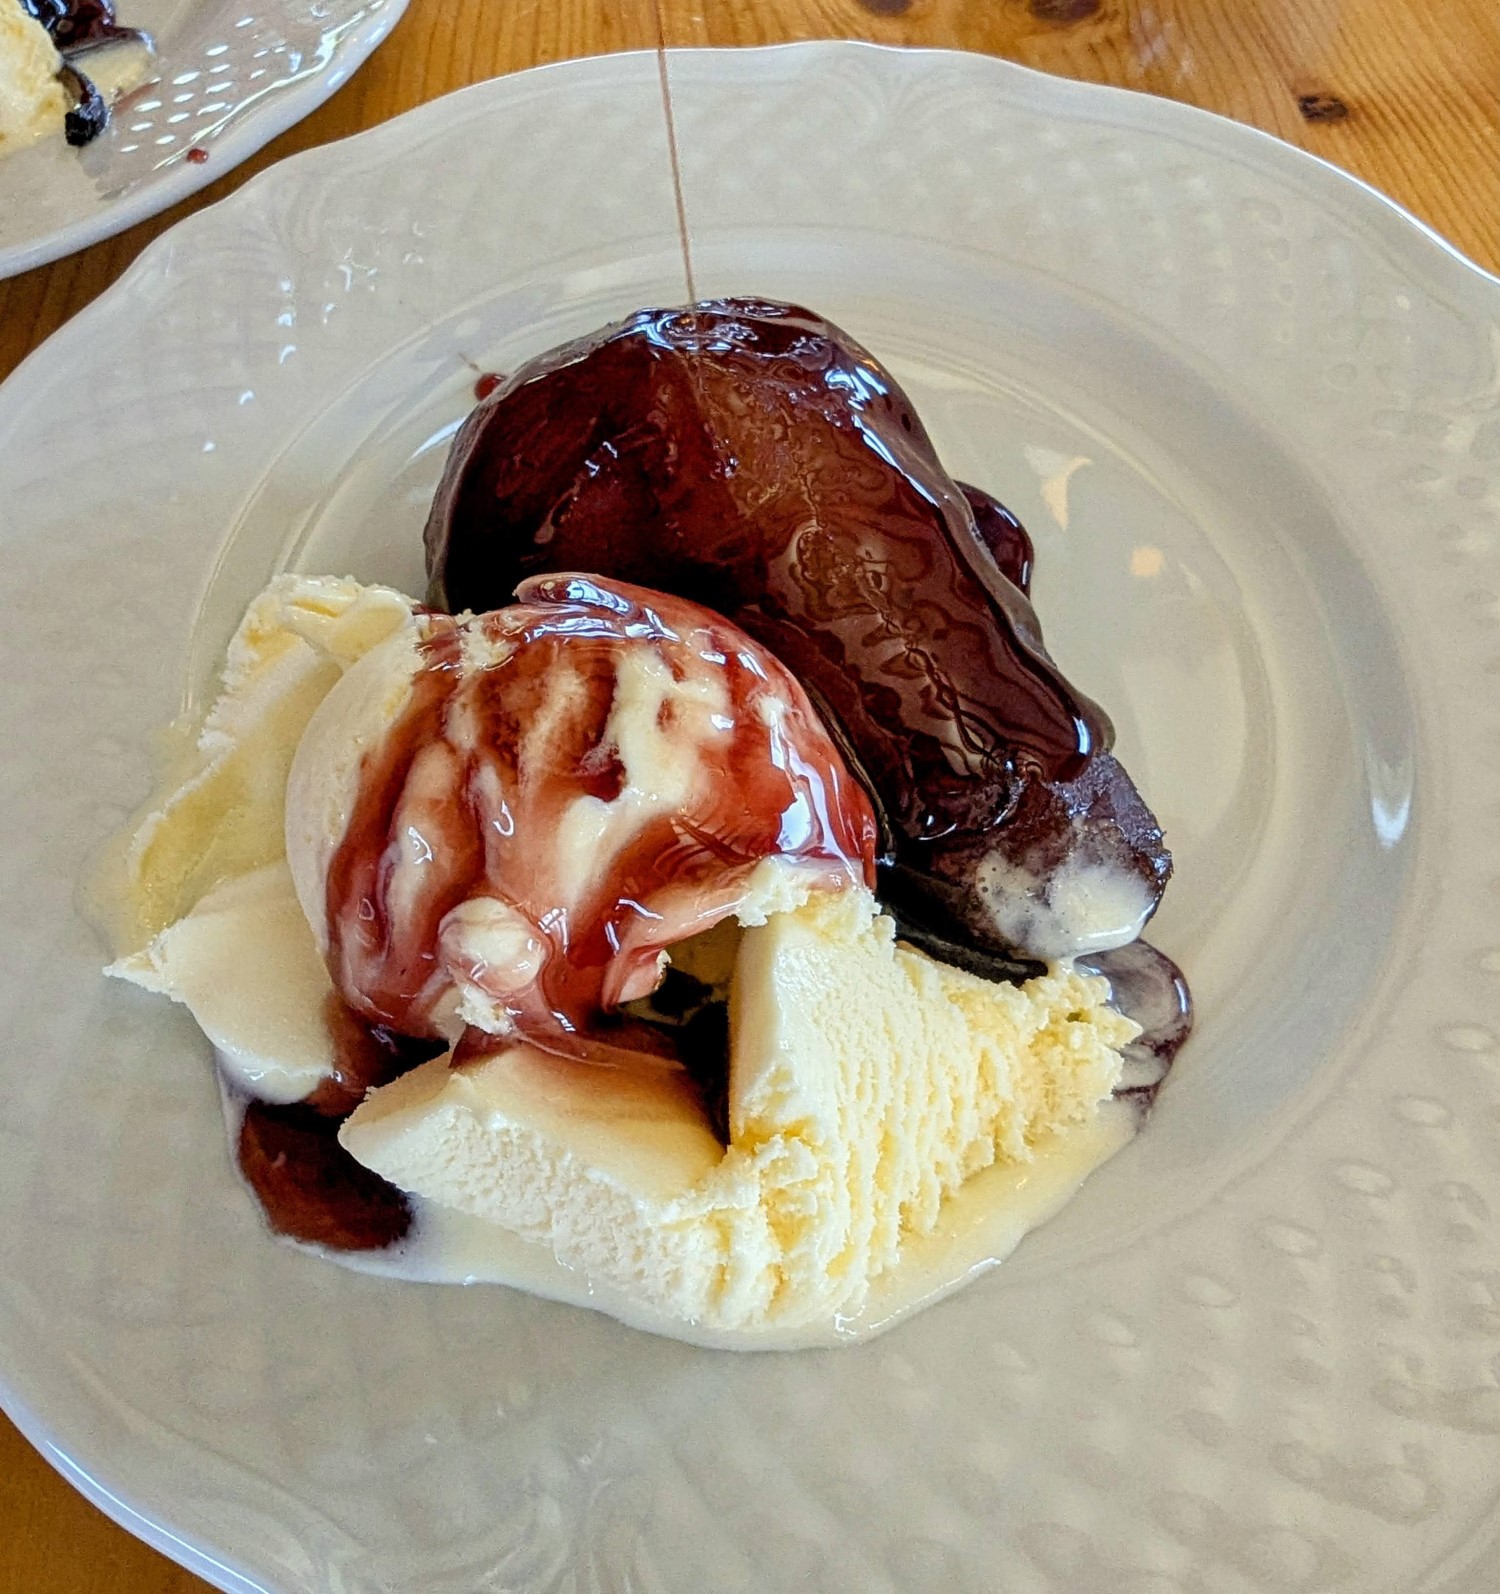
To serve, place one poached pear standing proudly upright in the center of a dessert plate. Generously drizzle the warm, ruby-red Chianti syrup right over the top, letting it pool beautifully around the base.

To really bring it home, serve it alongside a generous scoop of vanilla bean gelato or high-quality vanilla ice cream. The contrast between the warm, spiced pear and the cold, creamy gelato is absolutely heavenly. Garnish with a fresh sprig of mint, and enjoy!

Watch the video on YouTube

Follow along for more authentic recipes straight from our Italian kitchen to yours! Buon Appetito!
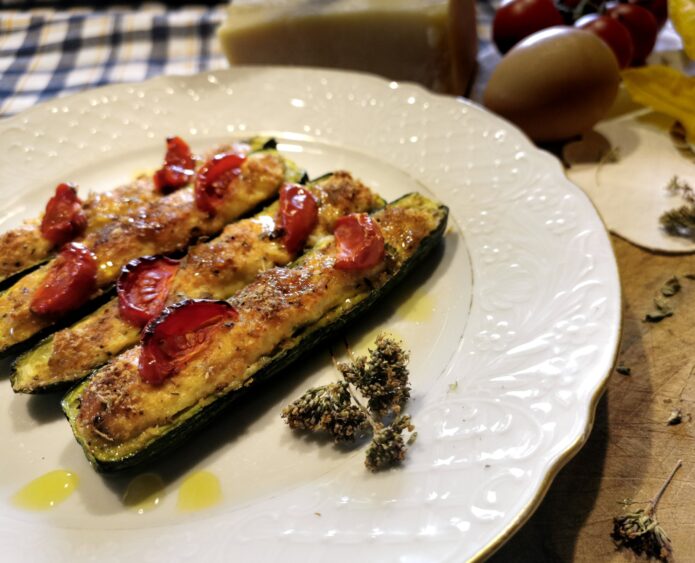
Zucchine Gustosine

Ingredients for 4 people:

4 small zucchini about 15 cm long,

8 tablespoons fresh ricotta,

1 whole egg,

2 tablespoons grated Parmesan cheese,

1 generous pinch of salt,

freshly ground pepper,

8 cherry tomatoes,

1 pinch of dried oregano or fresh basil

Cooking Tools:

A baking tray for the oven,

1 bowl,

a cutting board and a knife

Method:

Cut the zucchini in half lengthwise and with a tea spoon dig out the pulp to create small canoes. Place them on a plate, with the carved out part upwards, sprinkle with salt and let them rest for about half an hour, allowing to drain their water. Finely cut half of the pulp carved out of the zucchini and mix it with ricotta cheese, the whole egg and the Parmesan cheese; sea son with salt and pepper. Mix together well. Rinse the carved zucchini with water, to remove excess salt and dry well with kitchen paper. Fill each canoe with the filling and place them on the baking tray, decorate each zucchini with 2 medium tomatoes and sprinkle with oregano or fresh basil. Bake in a preheated oven at 200ºC/400ºF for 20 minutes. Very tasty served warm, but also delicious served cold for a snack or picnic

“When it comes to our Zucchine Gustosine, we’ve found the absolute perfect match in our Trebbiano Toscano. This crisp, refreshing white wine is a classic of our region and beautifully complements the delicate flavors of the ricotta and herbs. It’s a pairing that truly celebrates the bright, vibrant flavors of the Tuscan countryside, making it a must-try for our vegetarian guests.”

Diavoli a Cavallo

Ingredients for 4 people

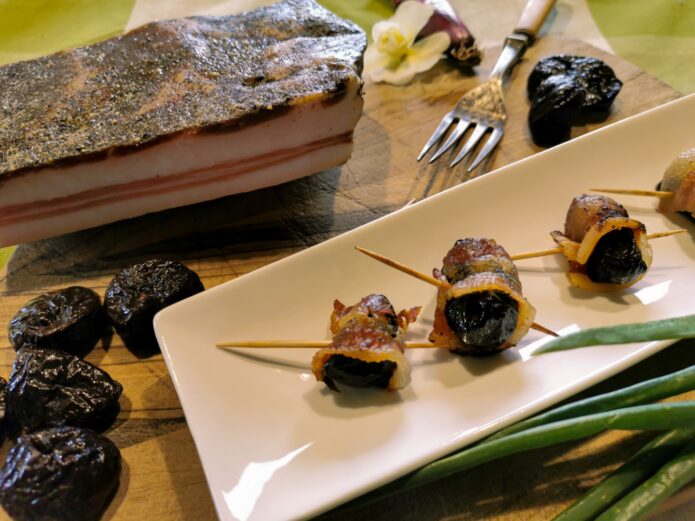
12 dehydrated and pitted plums

12 slices of bacon

12 toothpicks

Cooking tools:

Baking tray

baking paper

Method:

Wrap each plum with a slice of bacon and secure with a toothpick. I recommend only one layer of bacon, to obtain a nice and crunchy texture. Place the wrapped plums evenly spaced, on a baking tray covered with baking paper. Bake in a preheated oven at 200°C/400 þ F for 10 minutes. They are good both warm and cold. You can prepare them in advance, keep in the refrigerator and re-heat them just before serving

One of the most requested appetizers by our Personal Chef clients is definitely the Diavoli a Cavallo. These savory bites are always a crowd-pleaser! To elevate the experience, we love to serve them with our very own Petalo di Rosa rosé. The wine’s floral notes and crisp finish are the perfect match for the rich, smoky flavors of this classic dish.

RISOTTO DI ASPARAGI SELVATICI

If you want to learn it with family cooking, come and visit us in Tuscany

WILD ASPARAGUS RISOTTO

Ingredients for 4 people:
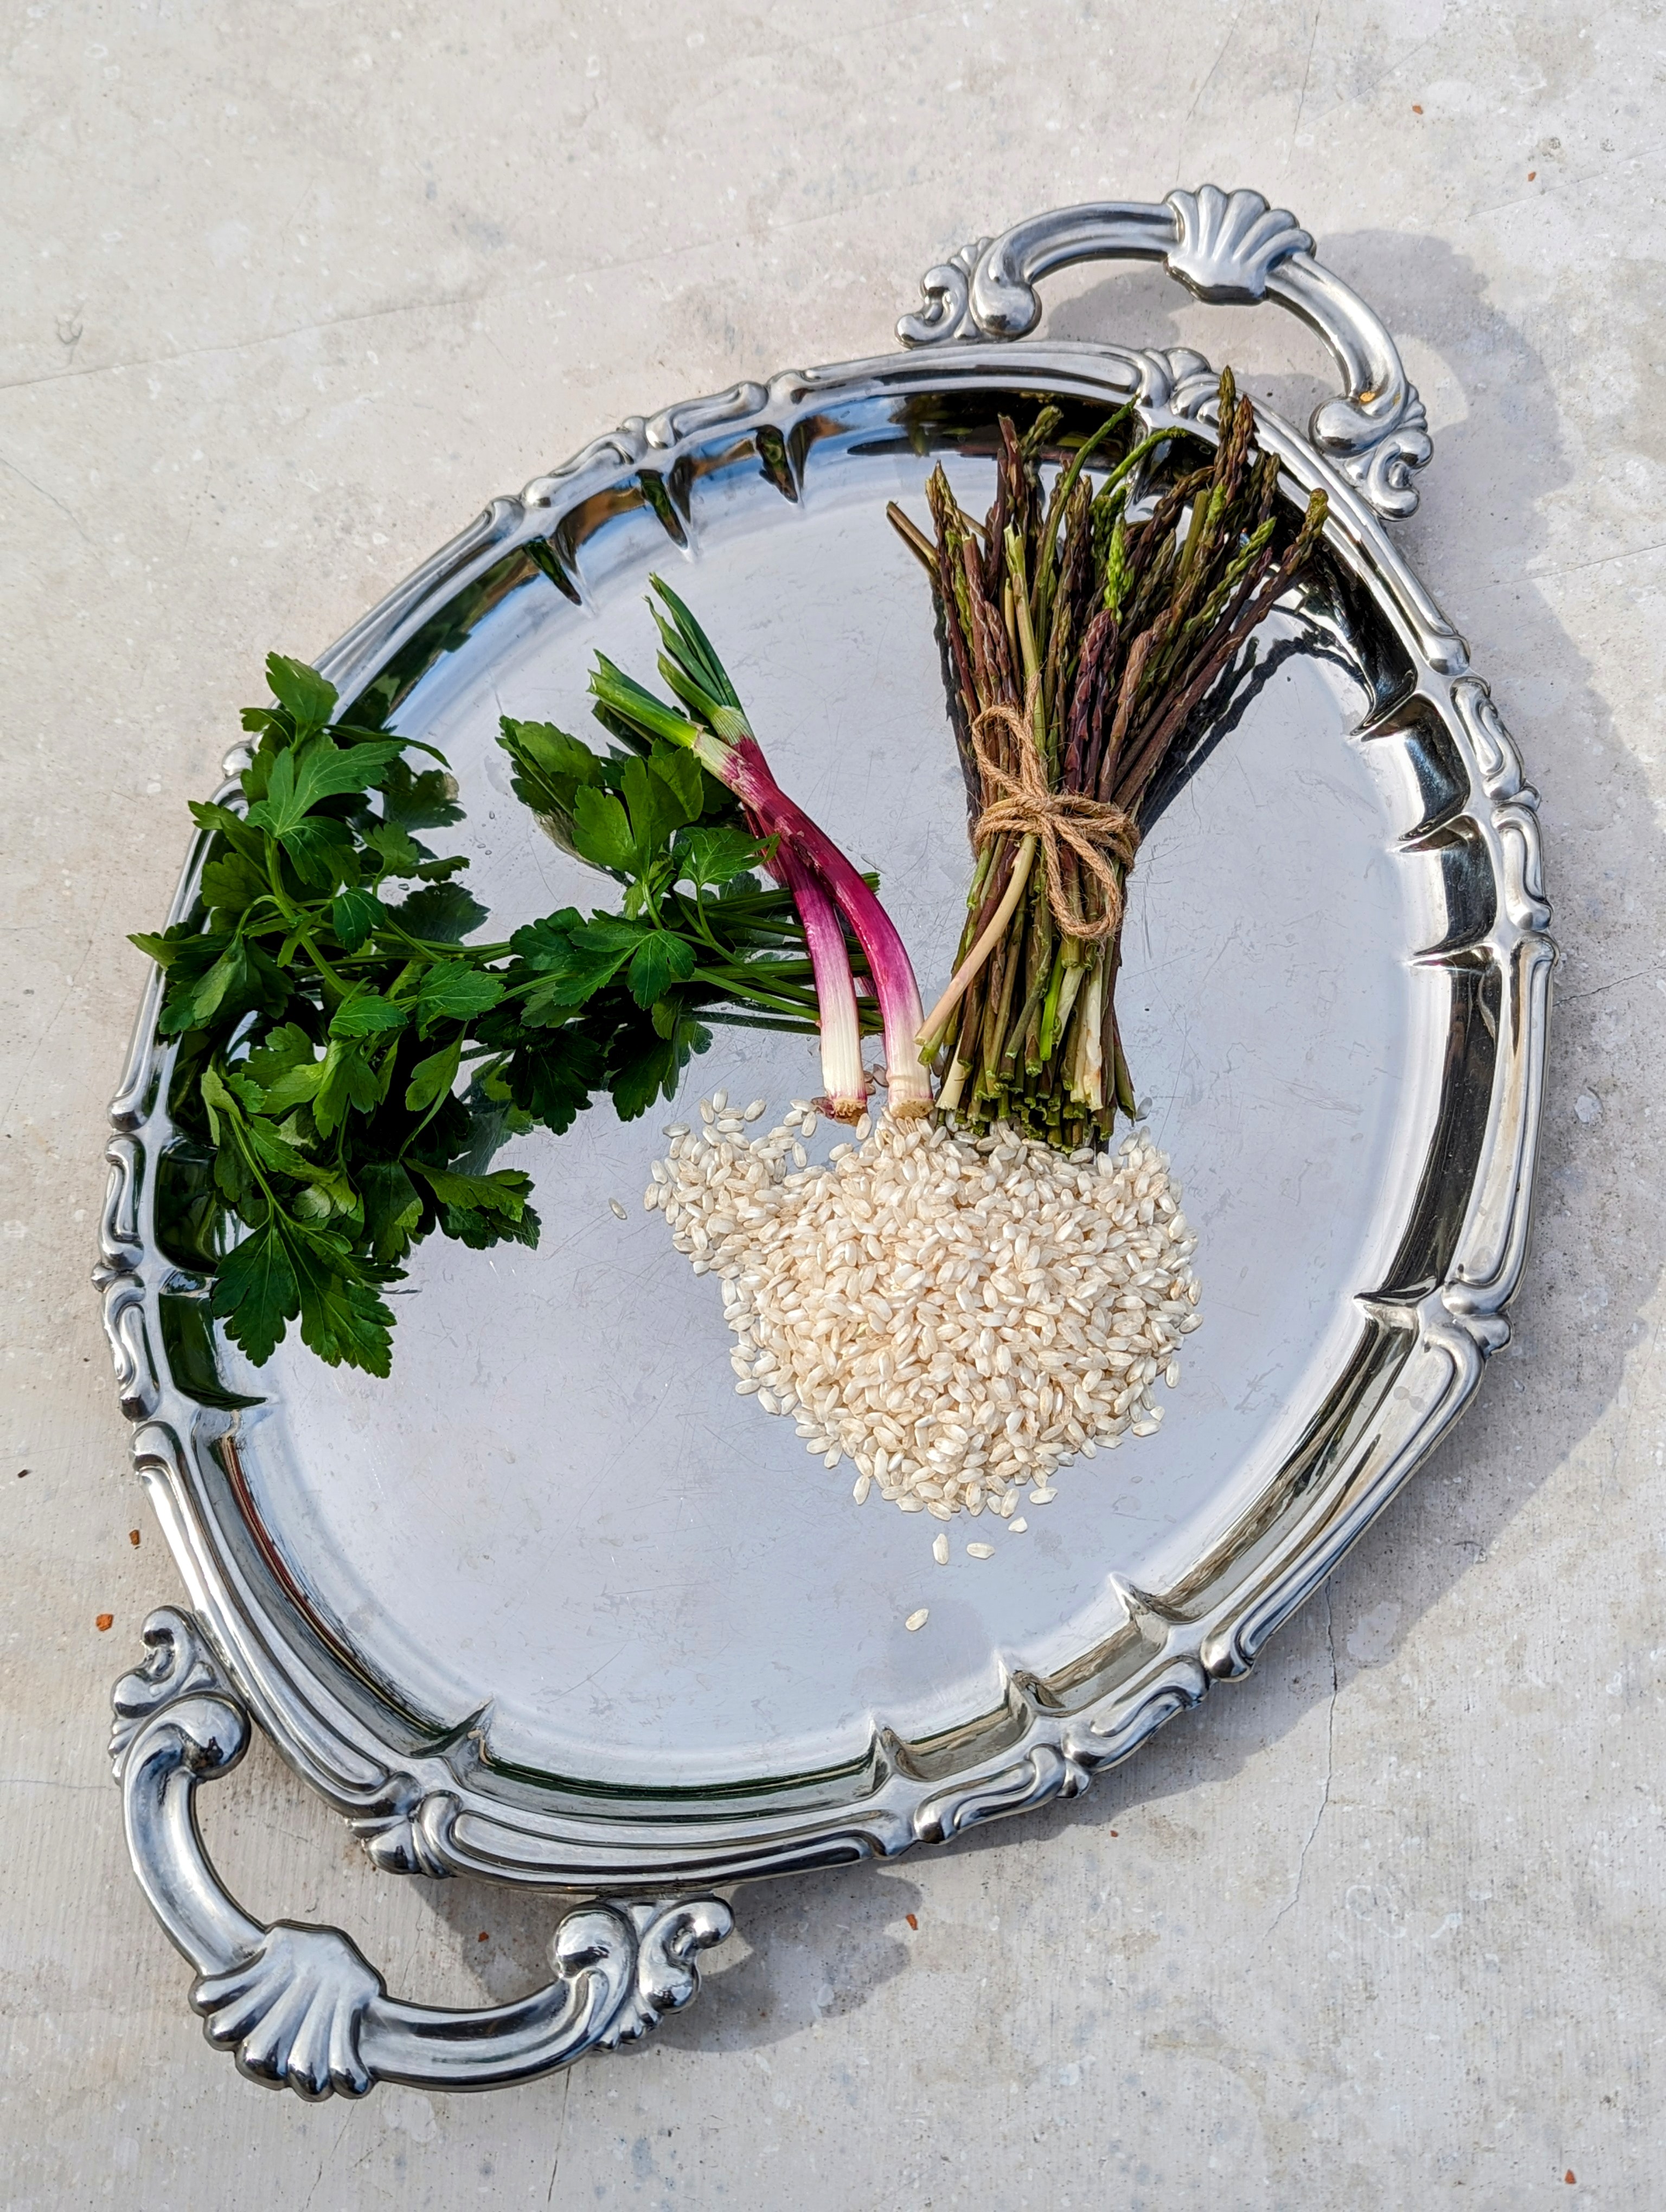
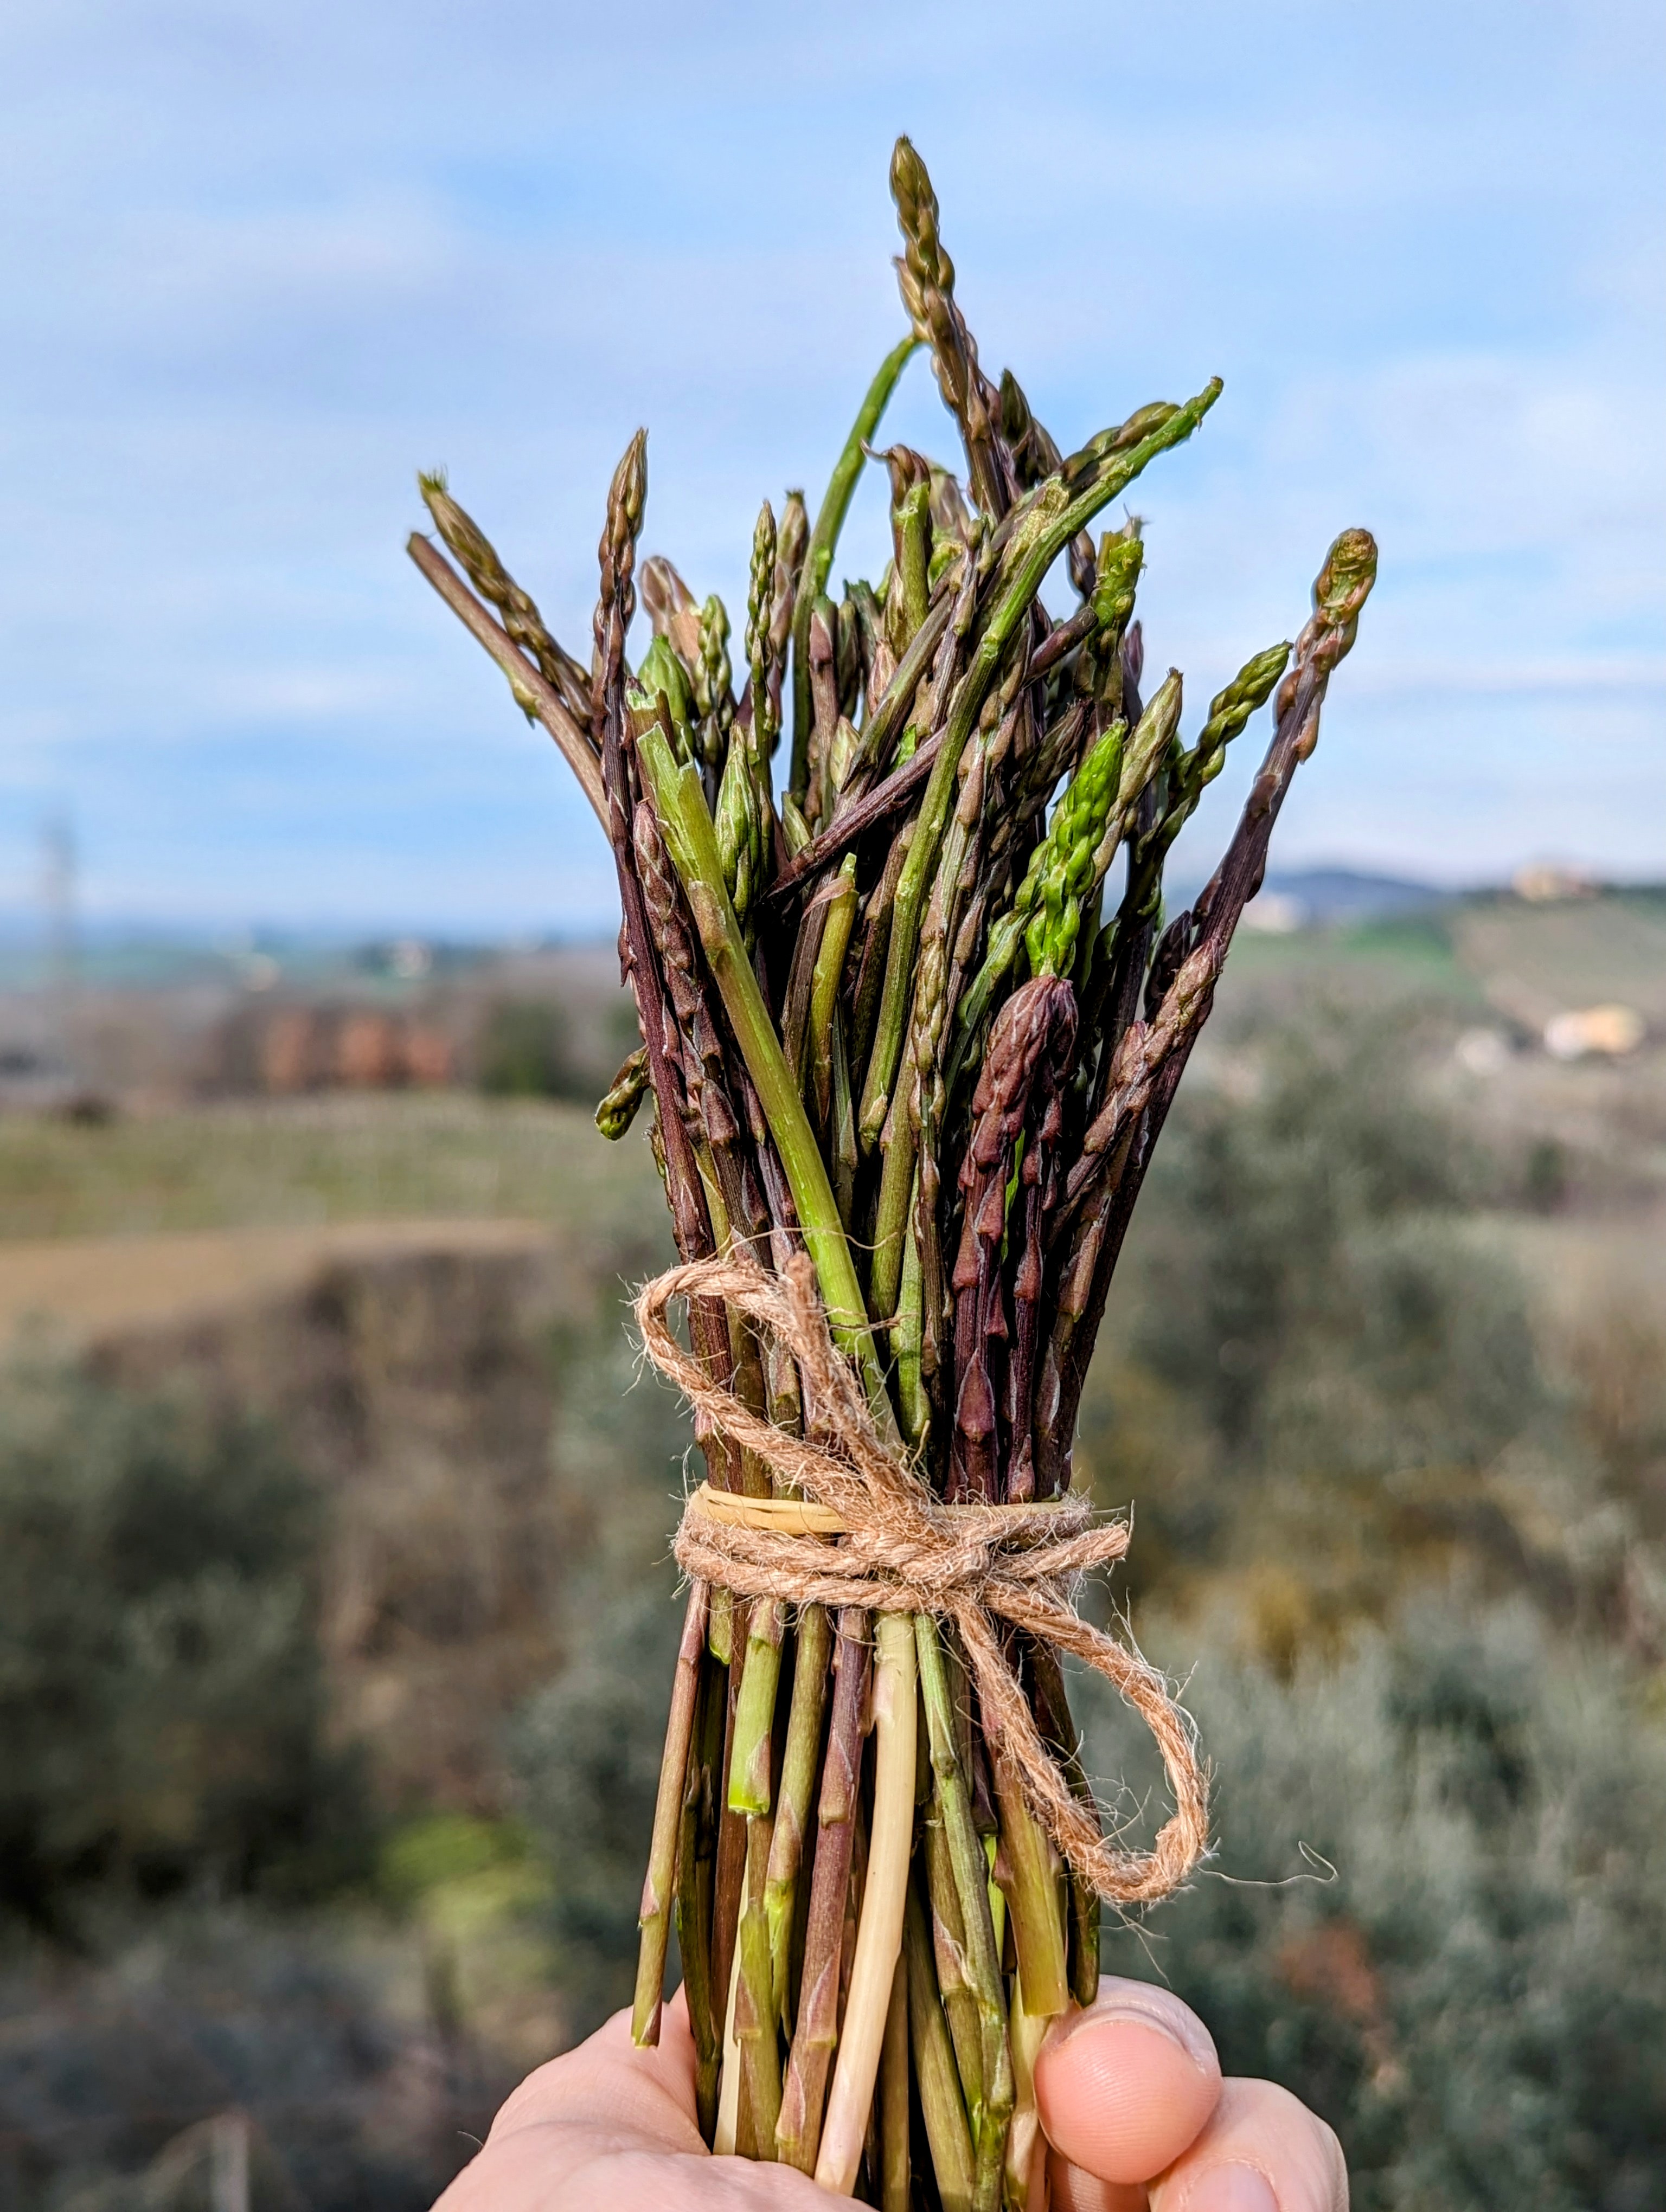
wild asparagus 200 gr
shallot n°2 (no large ones)
arborio rice (four hands full)
Parmigiano (2 tablespoons)
butter (1 tablespoon)
vegetable broth
extravirgin olive oil
solt
pepper

Ingredienti risotto

WHAT YOU NEED

pan with a bottom for even cooking
small pot for vegetable broth
ladle (we use the perforated risotto ladle which you can find here)
cutting board
knife
spoon
cupped ladle

BEFORE YOU START
Take the small pot and fill it halfway with water, you will need it for the vegetable broth. You will have to add the discarded asparagus and discarded shallots and bring it to the boil for a few minutes. Then you will use it when cooking the risotto.

Asparagus

PREPARATION OF THE ASPARAGUS SAUCE
On the cutting board, finely cut the shallot in the tender part, and put it in a pan at room temperature, add extravirgin olive oil (2 tablespoons) and a pinch of salt to 2 fingers.
Take the asparagus and separate them from the woody base, we will only use the tender part, to understand how to separate the two parts, apply light pressure starting at the base and going towards the tip until the asparagus breaks in half at its tender point.
We will use the soft part, put the hard part in the small pot for the vegetable broth.
Cut the asparagus into slices and leave the tip whole which is very beautiful for decorations.
We are ready to cook the sauce.
Let the shallot sizzle for a few seconds and add the asparagus to the pan, add vegetable broth if necessary and complete the cooking of the asparagus in 4-5 minutes. they must be tender at the end of cooking (taste them to see if they are cooked) and season with salt and pepper.

risotto

PREPARATION OF THE RISOTTO
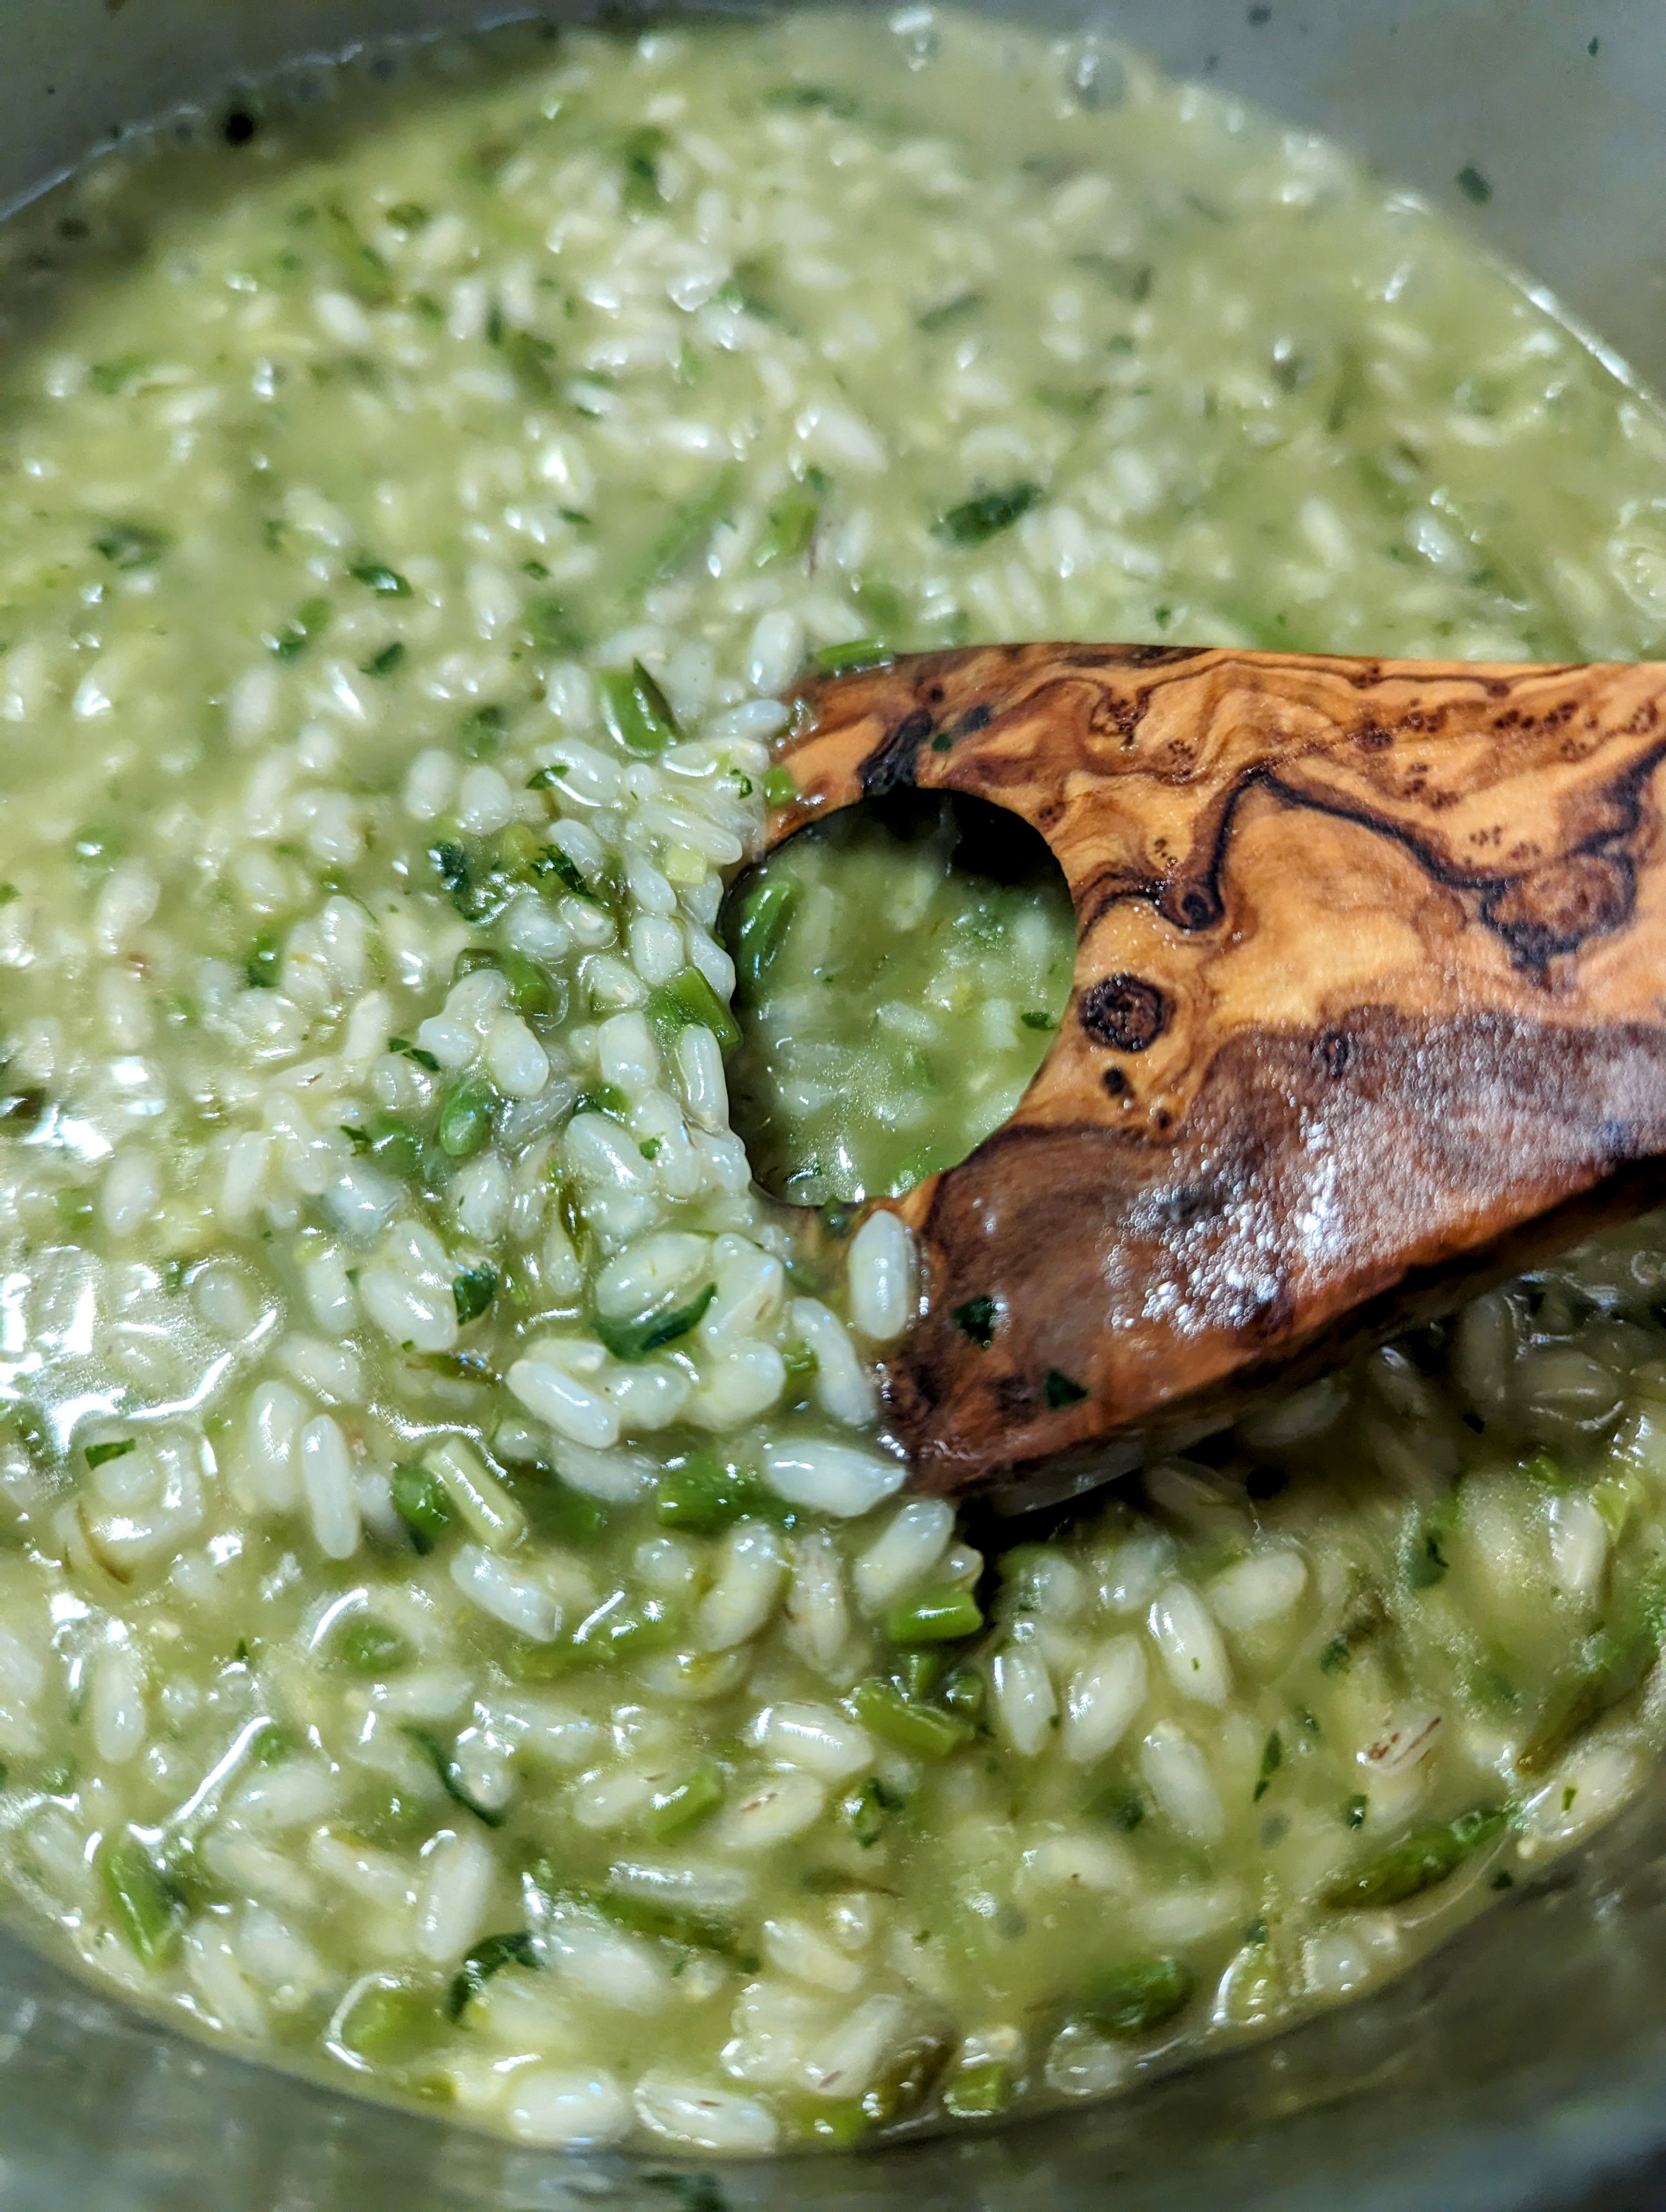
Take another pan and put the rice and a spoonful of oil in it, turn the heat on to medium heat, because we need to toast the rice a little. Stir the rice in the pan, being careful not to burn it, this will help you have an aldente and well-cooked risotto. When the rice grain has taken on a shiny color and no longer has a white core, it is ready to start cooking. We begin by adding vegetable broth, then add the asparagus sauce and let it cook for about 20 minutes, adding broth when it dries. as soon as the risotto is cooked, cream it, turn off the heat under the pan, add butter and Parmigiano, stir the risotto to homogenize and let it rest for a minute.
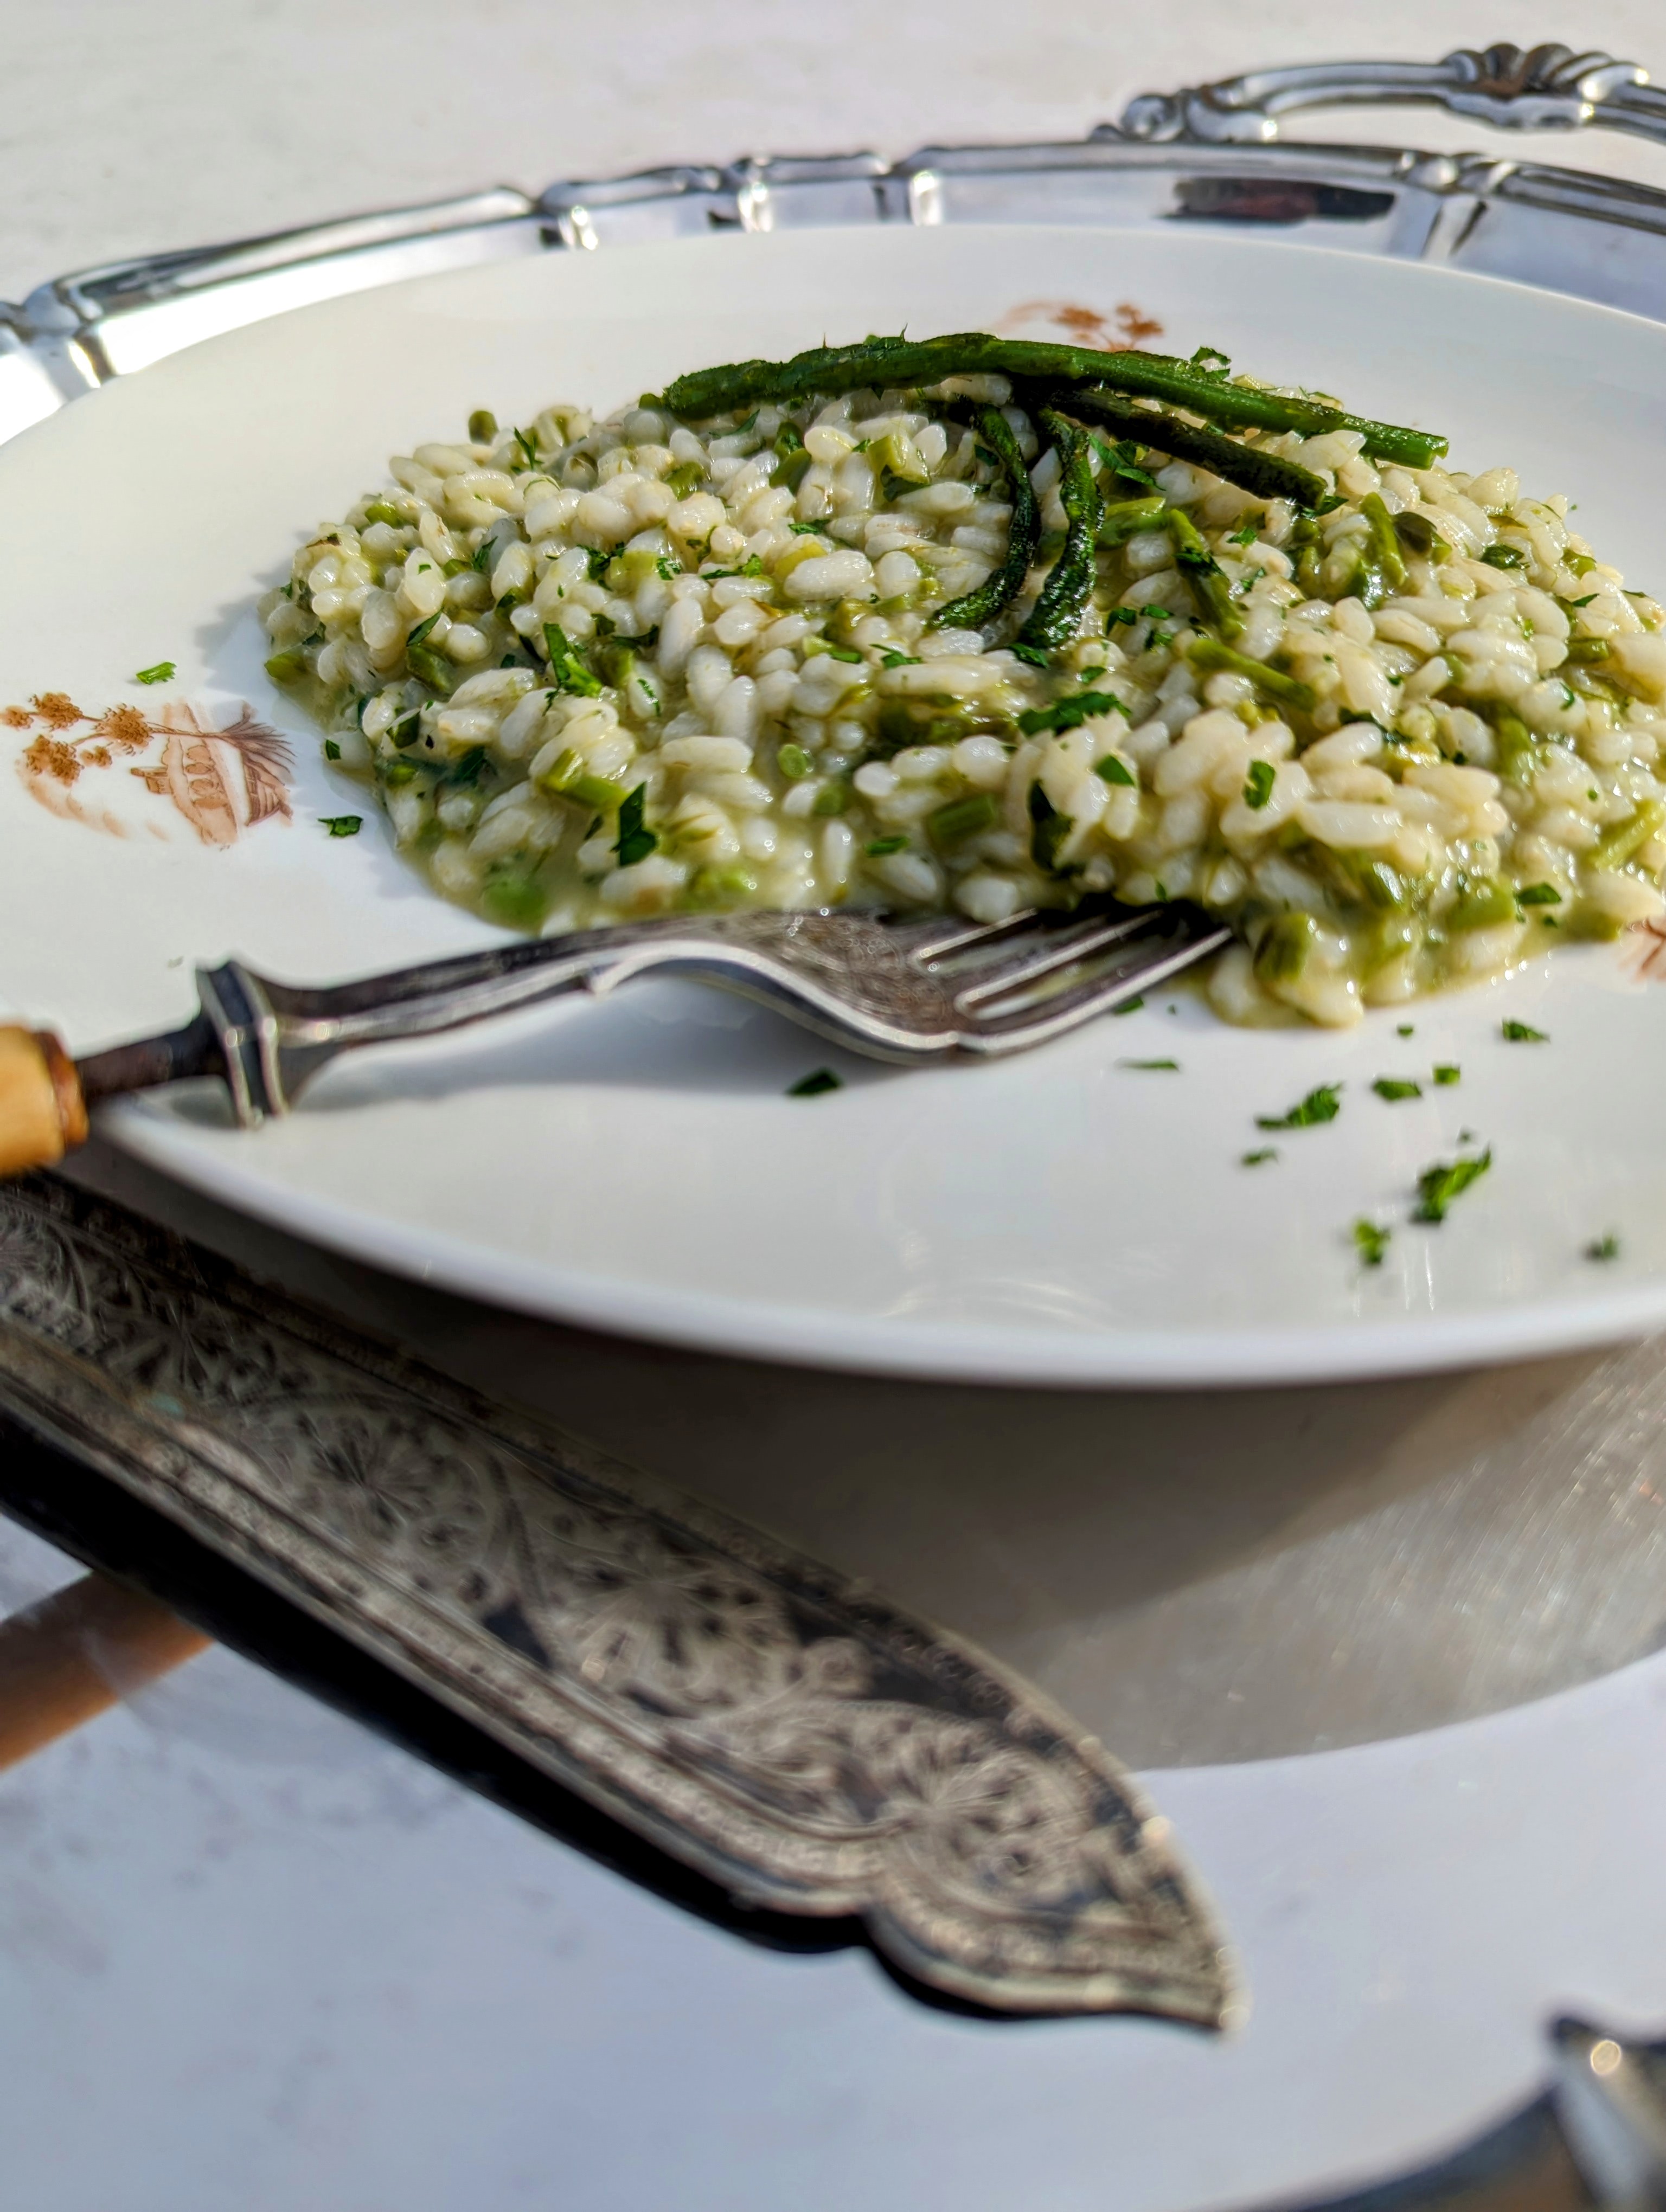
Serve on a deep plate and place a tip of asparagus on the plate.
Enjoy your meal

risotto asparagus

More photos of the risotto on our Instagram page

Torta con L’Uva

Cake with Grapes and Walnuts

Ingredients:

2 Eggs

7 Tbsp. Sugar (175 gr)

7 Tbsp. Milk (140 gr)

7 Tbsp. Sunflower oil (100 gr)

16 Tbsp. Flour “00” (400 gr)

1/2 Baking powder (8 gr)

Nuts (100 gr)

Black Grapes (500 gr)

Procedure :

Gently knead everything together in a bowl. Pour the contents into a baking sheet with parchment paper.

Bake for 30 minutes at 180 ° C (356 ° F).

Halfway through cooking, brush the cake with sunflower oil and sprinkle the top with granulated sugar. Finish cooking. Serve with powdered sugar.


ENJOY 🙂

If you missed our best photos from this article you can find them here on the Cooking Family Instagram

POLLO ALLA CACCIATORA

EQUIPMENT:
Large pan,
chopping knife,
cutting board.
1 free range chicken (in 8 pieces)
1 handful Black olives,
2 cloves of Garlic,
1 handful of Sage
1 handful of Sundried tomatoes
Olive oil extravergine Salt and black pepper
1 glass of White wine
Water around 0,5 liters

PREPARATION

sundry tomato

Start chopping garlic and sage very fine, same thing with the tomato and put it aside.

Warm up 3 tablespoon of the olive oil in a large pan, when it’s hot brow the chicken pieces both sides, then add the garlic and sage and let it go with high flame for a couple of minutes, before the garlic brown add the wine and let it reduce.
Now we can add the olives and the tomato, mix and add the water to almost cover the meat, let it simmer for 30 to 40 minutes, it will depend from te meat.
As the liquid will be reduced in a thick sauce, the chicken cacciatore is ready!

The Soul of the Italian Countryside: Pollo alla Cacciatora

If you’re looking for the ultimate Italian comfort food, look no further than Pollo alla Cacciatora. This “Hunter’s Style” chicken is a rustic masterpiece, slow-cooked with succulent tomatoes, aromatic herbs, and just the right amount of woodsy flare. It’s a dish that invites you to slow down, grab a piece of crusty bread, and enjoy the simple perfection of traditional Tuscan flavors.

A Wine That Demands Patience: Vign3

To elevate this rustic meal into a true gourmet experience, I’ve chosen a very special bottle from my shop: Vign3.

This isn’t your average table wine. Vign3 is a sophisticated, aged blend that honors the best of our terroir: 80% Sangiovese for that classic Italian heart, rounded out with 10% Merlot and 10% Cabernet. It is bold, elegant, and deeply layered.

Pro Tip for the Best Experience: Because these bottles have been aged to perfection, Vign3 needs a moment to “wake up” after being corked for so long. To truly enjoy the complexity of the Sangiovese and the structure of the Cabernet, be sure to open the bottle at least 30 minutes before serving. Let it breathe while the kitchen fills with the scent of your simmering chicken. This small act of patience transforms the wine, allowing its full bouquet to bloom in your glass.

[Shop the Vign3 Bottle Here]

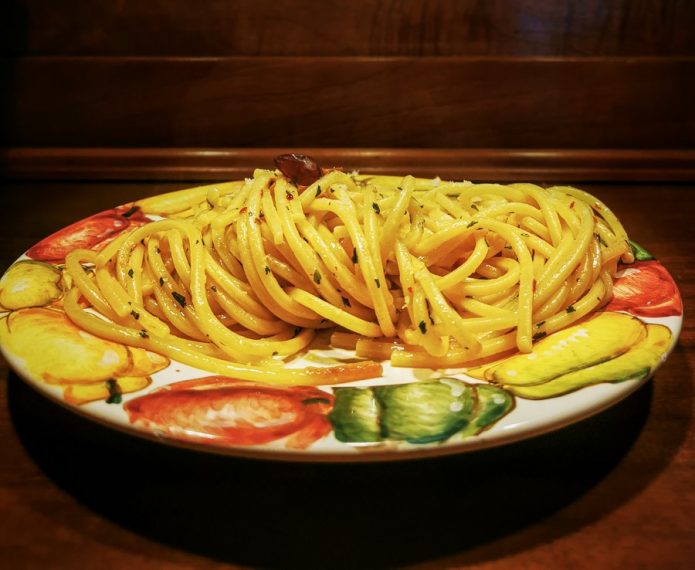
Aglio, olio & peperoncino, the trinity of midnight spaghetti.

When thinking to pasta the first that comes to my mind is spaghetti, and when thinking to spaghetti the first is with tomato sauce, but the second is Aglio Olio e Peperoncino, because is the recipe good for any occasion, is the pasta that feed everybody and make everybody happy, and most important is the pasta that you can make when your pantry is empty.

That’s why if you ask any italian about this pasta, it will recall memories of an unexpected visit and improvised meal, a late night “spaghettata” after a hangout with friends or the everyday pasta when you don’t have time or you don’t want to cook anything too sophisticated.

The Ingredients

When your pantry is empty and your fridge is lonely, when you live in Italy, you still have a bottle of olive oil, a clove of garlic forgotten somewhere, dry chilly pepper or powder and of course spaghetti!

Like for any simple recipe it’s essecial the quality of the ingredients and the quality of execution, here we are talking about extravirgin olive oil and pasta al dente.

– serve 4 people

  • 6 tablespoon evoo
  • 2 clove of garlic
  • 1 chilly pepper
  • 400gr spaghetti

The Procedure (watch the video)

In a pan warm up the oil togheter with the cloves of garlic crashed and the chilly pepper at taste, turn off the heat just before the garlic brown, to avoid the bitter taste.

In abundant boiling water add one handfull of salt and cook the spaghetti, strain one minute before the timing reported on the package and put your pasta in the pan with the hot olive oil, saute for a minute adding a cup of the pasta water. as the sauce reduce  little bit is time to serve.

Now there are several versions and opinions on the last garnish, never forget it’s a pasta made with what you have at home, so you can add fresh parsley or parmigiano on top, at your taste.

An honourable mention goes to the spicy mix made in Tuscany from a friend, you add 2 teaspoon of this dry mix to the oil and the job is done, we tried last weekend and is very surprising and hot!

Buon Appetito

Panzanella – Traditional Tuscan bread salad

Ingredients for 6 people

600 g of two-day old Tuscan bread

6 Ripe but firm tomatoes

1 Red onion

1 Cucumber of your favorite kind

A handful of basil leaves

6 Spoonfuls of red wine vinegar

3 Four-finger pinches of salt

The secret to get a good Panzanella lies in knowing how to soak the bread having good olive oil extravirgin and excellent vinegar.

but if you follow my instructions you will all become master panzanella makers!


PREPARATION

On the table in front of you, from left to right (if you are right-handed, otherwise do it the opposite) put: the old bread cut in slices one finger high; the basin full of cold water, and the empty salad bowl.

Soak the slices one at a time for 5 seconds, then use your hands to squeeze all the water out.

Then break the bread up into big chunks in the salad bowl.

The bread must be wet, but also soft and spongy; if you keep it in the water too long, you will end up with a pulp which will not blend well with the fresh vegetables.

Now you have done most of the job! Cut the tomatoes into thumb-sized pieces, slice the onion into thin rings, break the basil with your fingers, peel and cut the cucumber into thin round slices.

Now you just need to add the seasoning – oil, salt and vinegar.

Mix softly using your hands, so as not to spoil the texture.

Let it cool off in the fridge for at least half an hour before serving.

Farmers used to make this dish during the harvest season to refresh themselves, and it was often brought directly to the fields by their wives, not to waste time going back home for lunch.

A poor dish, often accompanied by wine diluted with water, was good to slake thirst without being heavy. The recipe is very old: 700 years ago, Giovanni Boccaccio, poet of our town, used to call it “Pan lavato”, “washed bread”. Tomatoes were added after the discovery of the new world. The name seems to be a combination of “pane”, bread and “alzanella”, an old word for large salad bowl.

La Sportellina – a Tuscan traditional Easter cake

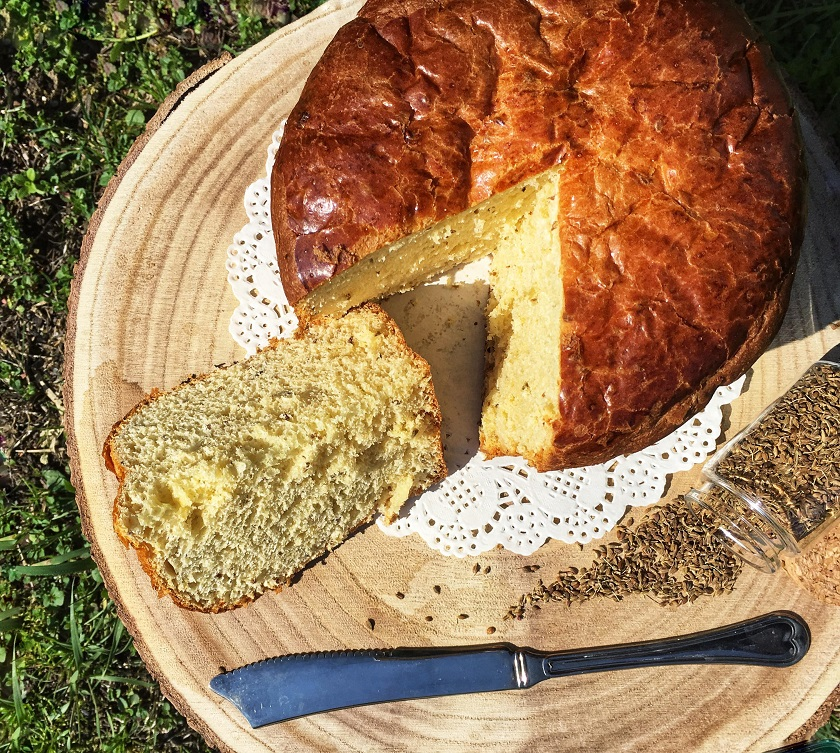
In Tuscany, we have a special sweet tradition, called “la Sportellina” or “schiacciata di Pasqua” (literally the Easter squashed bread). It’s quite a funny name for a cake that looks anything but squashed, I know! But actually the name comes from the great amount of eggs that need to be cracked (squashed) into the batter.

The countryside Easter traditions

The season of Lent in the old days, was by precept a time of fasting and repentance, so people would resort to homemade products only. It was a common and very heartfelt religious tradition, especially in the countryside. Most of the peasant families’ meals consisted of soups, polenta, lots of vegetables from their own farm or just some homemade bread and freshly picked herbs. Adding a pilchard in oil every now and then was a real delicacy that not all could afford. So no wonder on Easter, people would indulge on abundant dishes and plenty of meat, generously soaked by a glass or two of good wine!

The food preparations usually began during the Holy Week before Easter, because everything had to be produced in great quantities, to be shared with families and neighbors as a symbol of gratitude and celebration.

As a child, I remember a great buzz around here, of people going up and down the town’s alleys from early morning until sunset. I could tell Easter was coming just by raising the nose and sniffing the air: suddenly I was engulfed with the sweetest smell of aniseed and freshly baked cake, that used to come from the town’s wood-fired oven. Yes, because at that time, there were no household appliances and not everyone could afford to have their own oven. So during the Easter rush, when women used to prepare lots of oven-baked goods, they had to run up and down the main street with their kneaded doughs to reach the town’s oven when their turn came. Imagine that oven working day and night to bake hundreds of pans of traditional delicacies, which they would take back home once baked. Of course the smell that filled the air back then, was astonishing!

tuscan-traditional-easter-cake

The origins of sportellina cake

You see, the connection between ancient traditions and nature is always amazing, because once again nothing is random: at the beginning of the spring season, hens used to lay more eggs than usual, and they had to be consumed pretty fast, since there were no special storing procedures like nowadays. So this Easter cake – like most of this season’s cakes and dishes – was just the perfect way to consume quite a few eggs.

As I said, our mothers and grandmas used to prepare this traditional cake in large quantities, during the Holy Week. It would take a lot of work and patience to make this recipe, due to the rising and baking times, which were very long. Imagine they had to knead and allow the dough to rise, again and again for no less than 5 times, before baking it! That’s another one of the reasons why these cakes were being made in large quantities. Some pieces were then being wrapped and given to the family’s guests and neighbors, others were being offered to the church, to be served on the way out, after the Holy Mass on Easter day, and a few were being left for breakfast in the days after.

In our days, when everything seems so rushed and we’re always in a hurry, it’s hard to think of dealing with such a long and delicate preparation and of course we all know you can easily find it at the supermarket. What you don’t know is the feeling you get when you dip your hands into that dough and start kneading. You take that moment just for yourself, to clear your mind and let your thoughts run free, while the sweet smell of aniseed and mint liqueur fill your nostrils enough to take you back to your childhood days. It doesn’t matter how long it will take, it’ll all be worth it when you see that precious little piece of dough come up and become brown, making you feel proud for once again having kept the tradition alive.

The Sportellina Recipe:

1,5 kg 00 flour

50 gr. brewer’s yeast

150 ml milk

7 eggs (plus 1 to brush the surface)

450 gr. sugar

110 gr. extravirgin olive oil

50 gr. butter

50 gr. mint liqueur

50 gr. maraschino

15 gr. aniseed

1 orange (zest and juice)

First of all dissolve the brewer’s yeast into the warm milk, then gradually add in some flour (about 300-400 grams) and start mixing until well incorporated. Knead it into a ball and put it in a bowl to rest for about 2 hours.

After two hours, mix in 3 eggs, 150 gr of sugar, 40 gr. of olive oil and another 400 grams of flour. Then let it rest again, in a warm place until it doubles the volume (this time will take about three hours).

For the third step, add in 2 eggs, 150 gr of sugar, 40 gr of olive oil, 25 gr of mint liqueur, 25 gr. of maraschino and again 400 gr. of flour. Knead it again until all ingredients are well combined and leave it to rest for another 3 hours.

Finally, mix in the rest of the ingredients and knead it for a while, then give it a final 3 hours rest again.

Divide the batter into 3 equal parts and put them into the baking moulds (we use the same ones as for Panettone). Put the moulds in a warm place covered, and let them rise for 4-5 hours, or until the double their volume.

Brush the top of the cakes with the beaten egg and then bake in a preheated oven at 180° C for about 50 minutes, or until the surface becomes brown. Leave them in the oven to rest for 10 more minutes and then let them cool completely before serving.

You can keep the cakes in a plastic bag, in a cool dry place for up to one week, so you can actually bake more pieces and offer them to family and friends as an Easter gift, or you can just have a wonderful breakfast everyday for a whole week! Enjoy!tuscan-traditional-easter-cake-buona-pasqua

Baby it’s cold outside!

The  renowned florentine bread soup

In older times, a chilly winter day in the countryside was often warmed up by a pot of hot vegetables soup, the ‘ribollita’ or ‘minestra di pane’ (bread soup). A typical peasant dish made from scratch, that deepens its roots in the Middle-ages. Farmers used to prepare a big batch of this hearty vegetable and beans soup, usually on a Friday so they would eat it over the weekend. That’s because not only did they had to make it last for as much as possible to feed the entire family, but it turned out to be even better the day after. So initially they ate the soup with a lot of white Tuscan bread chunks dipped into it (‘minestra di pane’- bread soup) and then re-boiled the leftovers the day after (‘la ribollita’ – the re-boiled bread soup).

Ingredients – cavolo nero

To this day, the Tuscan bread soup still remains the best way to keep us warm during the cold season and load up on our daily helping of vegetables, because of its perfect combination of carbs, legumes and veggies.

The main ingredient, the one that and gives the whole character to this dish, is the Tuscan kale (or lancinato kale). It’s mandatory for an authentic taste, because you can’t name it ‘ribollita’ if you don’t have the black-leaf kale. We call it ‘cavolo nero’ (translated black cabbage), and it’s a leafy, dark-green type of cabbage, packed with more than 50% of the RDA of vitamins A, C and K, and rich in antioxidants and other essential nutrients, not to mention it’s very low in calories. You can find this super ingredient in every Tuscan farmer’s orchard, from November through spring and it’s best eaten freshly picked, during the cold season.

The recipe

So let’s cut to the chase and talk about the best recipe of ‘Tuscan bread soup’ you’ll ever have. This has been passed down through generations and it’s part of our family’s comfort food cookbook. It’s so simple you can’t go wrong, and so delicious that it’ll fill your house with that special dinner smell that’ll make your tummy rumble.

You’ll need:

a generous amount of extravirgin olive oil freshly cold-pressed

300gr of dry borlotti beans

400gr of Tuscan kale

3 carrots

3 potatoes

1 red onion

1 celery stalk

1 twig of thyme

2 cloves of garlic

2 thick slices of Tuscan prosciutto pork ham

In a large pot over a livery fire, pour a generous amount of extravirgin olive oil and add the prosciutto, the carrots, the celery and the onion well chopped. Cover with its lid and stir-fry for about 5 minutes. Add in the rest of the vegetables cut into pieces, the thyme and the beans. Make sure you keep the pieces quite small, the soup should be thick but not chunky. Now pour in at least 1 liter of hot water and 3 four-fingered pinches of salt. Lower the flame, and cook for at least 90 minutes, covered with a lid. Serve this soup piping hot, with a grinding of fresh pepper and chunks of Tuscan white bread dipped into it, stingily rubbed with garlic and generously sprinkled with Tuscan extravirgin ‘olio novo’.

A night in the fridge will encourage all the flavors to blend together beautifully and all you’ll need to do the next day is bring the whole pot to a boil again, and enjoy a hot bowl of wonderful ribollita.

The season is just right to taste this Tuscan basic recipe, so why not give it a try and amaze your family with a new delicious and super-nutrient dish that will delight your senses and warmup your winter holidays!

Oh, and remember: when in Italy during the summer months, please don’t ask us for a pot of ribollita, it’s definitely off season! Have a holly jolly winter everyone!